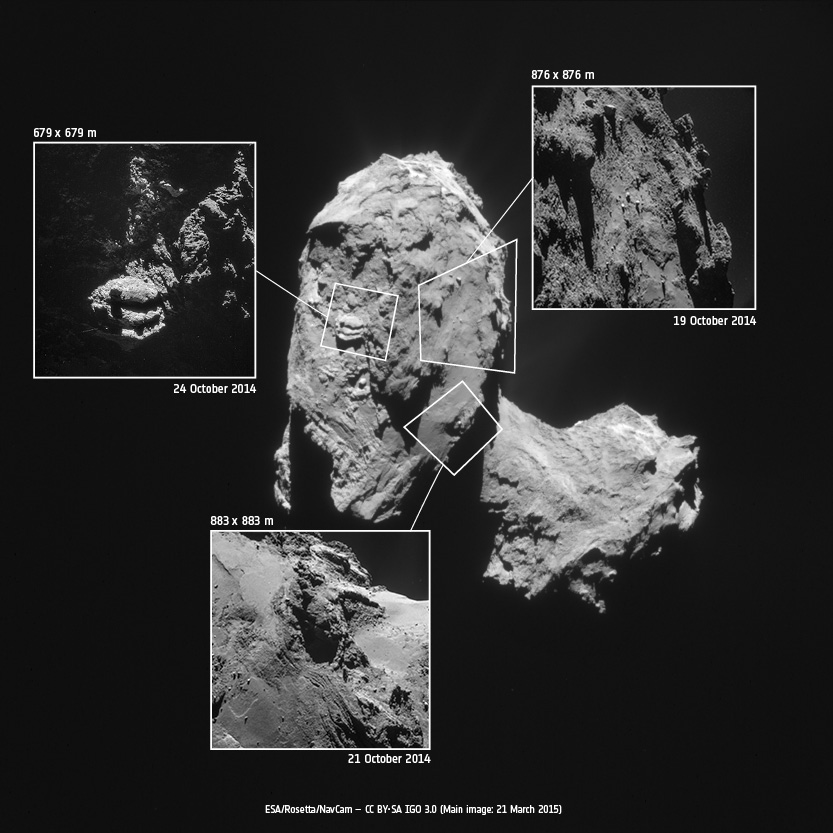
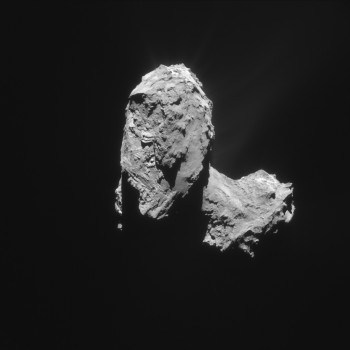
Today’s CometWatch entry presents a recent image of Comet 67P/Churyumov-Gerasimenko – taken on 21 March 2015 – along with three previously unpublished close-up images taken during last October’s 10 km bound orbit.
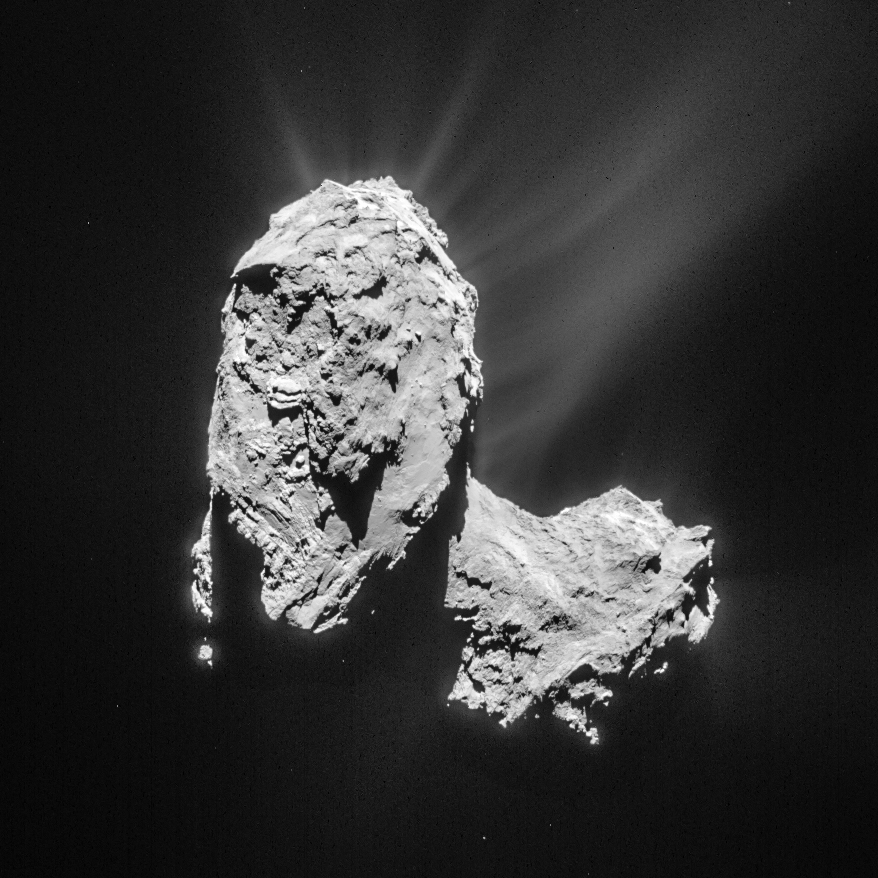
Cropped and processed single frame NAVCAM image of Comet 67P/C-G taken on 21 March 2015 from a distance of 82.6 km to the comet centre. This cropped version measures about 6.2 x 6.2 km. The image is lightly processed to bring out the details of the outflowing material. Credits: ESA/Rosetta/NAVCAM – CC BY-SA IGO 3.0
The full-comet image from 21 March (above) has been lightly processed to enhance the details of the outflowing material. It was taken from a distance of 82.6 km, the image scale is 7 m/pixel, and the 1024 x 1024 pixel image measures 7.2 km across.
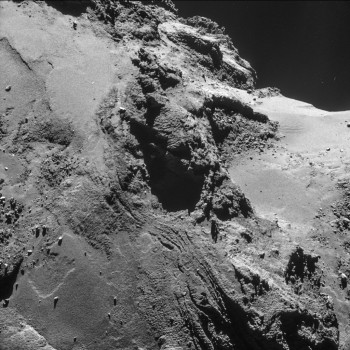
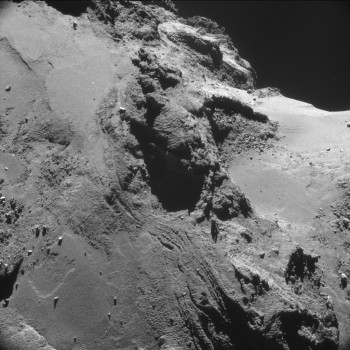
Processed version of the 21 October single frame NAVCAM image. Credits: ESA/Rosetta/NAVCAM – CC BY-SA IGO 3.0
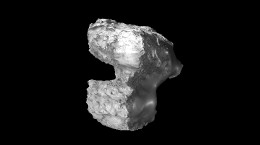
The close-ups highlight the range of contrasting surface features seen on the comet, in particular in the Anubis and Atum regions on the comet’s large lobe. The graphic above locates the approximate regions of each inset on the comet – note that due to the change in distance and orientation, the insets are not exactly oriented with how they appear on the main image and the illumination conditions are also different. The close-ups have been processed to bring out the details of the surface and the local nebulosity; the original frames are provided at the end of the post.
The bottom image in the context graphic captures part of the smooth Anubis region on the large lobe (left half of the image), a small portion of the rugged Seth terrain (centre), and the smooth Hapi region that defines the comet neck (right).
Relatively speaking, Anubis and Seth lie in the foreground, while Hapi is in the background: this can be seen clearly in the main image, where parts of the surface clearly visible in the close-up are shadowed by the large lobe.
As described in the recent OSIRIS papers published in Science, the smooth portions of Anubis appear faulted or folded in some places, and scattered boulders may be the products of mass wasting.
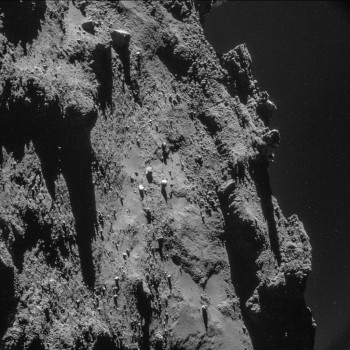
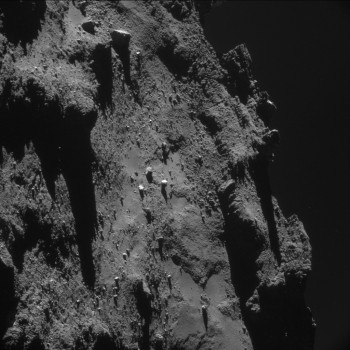
Processed version of the 19 October single frame NAVCAM image. Credits: ESA/Rosetta/NAVCAM – CC BY-SA IGO 3.0
The inset at the top right of the context graphic also shows part of Anubis, close to the border of Seth (towards the right in the close-up). Scattered boulders are also visible here, along with more plentiful debris seen typically at the base of cliffs.
This close-up image has been processed to emphasise the faint nebulosity above the horizon on the right, to show the ‘peaks’ on the horizon silhouetted against this nebulosity, and to see the deeper, darker shadows they’re casting onto the nucleus.
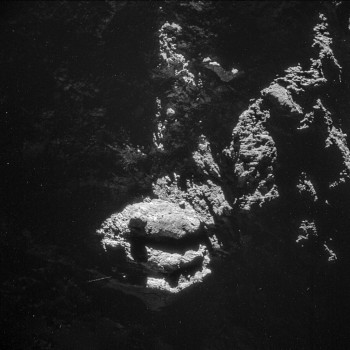
Processed version of the 24 October single frame NAVCAM image. Credits: ESA/Rosetta/NAVCAM – CC BY-SA IGO 3.0
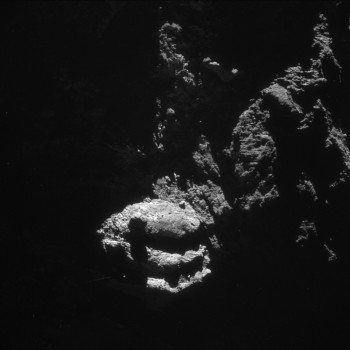
Last but certainly not least is the close-up at the left of the context graphic, which highlights part of the highly complex Atum region and its aligned linear features.
This close-up image has been processed to reveal more of the dimly lit portions of the nucleus surrounding the prominent layered structure. A large boulder – approximately 30 m across – appears to be perched at the edge of the curious three-slabbed ‘outcrop’, casting its shadow onto the layer below.
All four original 1024 x 1024 pixel images are provided below.



Discussion: 16 comments
Great images! Couple of things…
Surely the scale isn’t less than a cm/pixel?
Also, I can’t be sure, but do I see a mid-air boulder in one of these images?? I’ve cropped to put the boulder in question in the centre of the image: https://www.flickr.com/photos/shibbyuk/16325894843/player/
Great catch and I’d be interested in knowing if it is a floating bit of the comet as well.
Wonderful. You have outdone yourselves again.
–Bill
Living [and dying] near a star is the last of a series.
The matches from head lobe to body lobe in this photo are quite clear. But rather than link to the blog that annotates them, or stating blithely that they are there without any pointers, I’ll describe them in detail. As Marco says, this makes it very wordy (which is why I started the blog with annotations). However, by following the instructions below and either using a ruler on your screen or measuring software, you’ll be able to see the matching process in detail and see that it’s more than hand waving and pointing to isolated similarities. All the matches below follow each other in sequence and in lock step all the way for three-quarters of the visible head rim. They match not only in their individual lengths along the head rim and body shear line but also in their aggregate lengths when you measure from each match back along the line to the beginning. And, of course, they match in the way they step back and forward from that general line.
Anyone who spends some time with a ruler or on-screen measuring tool while following the instructions below will come away with at least the thought that these matches are quite uncanny, and most probably feel that the shearing and stretching of head lobe from body lobe is a distinct possibility.
If you look at the lowest part of the body lobe in the photo (but not the thin, illuminated strip), you see three quasi rectangular indentations aligned end-to-end. They are sloping from the bottom, up and to the right along the right hand perimeter that’s visible. They slope at about 50°. For orientation, there are two tiny dots, one below and one to the right of the formation.
The left hand edges, or ridges, of each of these three rectangles match to three ridges on the head lobe rim to the right. The three head lobe ridges can be located by looking at the bottom edge of the head lobe as presented here. Almost exactly in the middle of this edge is where the bottom of the three matching head ridges sits. You can trace this and the other two above it rising in a line and at roughly the same angle as the three ridges on the body.
If you were to measure the length of each pair of ridges on head and body, they would be the same length although where you start and stop them is open to interpretation due to the thick joins on the body lobe. More importantly, if you measured the length of all three together for the head and then for the body as a check, the two separate formations of three are identical in length. If you measure the slight step-back between each ridge on the body, it’s the same as the corresponding step-back on the head. They are also almost parallel.
Moving beyond the upper end of the three body ridges, you can discern a very faint, white line that curves round to the right until it meets a shadowed divot. If you then move to the head lobe, you can see the same shape and size of line curving round to the right until it meets a similarly-sized divot. For orientation, there are three boulders arranged in an equilateral triangle sitting within this curve on the head rim. Doing a measurement from the divot back to the beginning of the three ridges on both lobes serves as a check. The two distances are identical.
Staying on the head rim, if you trace the thin, shadowed line from the divot next to the three ‘boulders’, it continues running at the same angle as the initial three ridges but is now displaced a little to the right. At first, it’s quite straight but a tiny bit crinkled. It then curves round 90° sharply leftward to a point on the head rim where it makes a 90° turn back again to carry on along the main sloping up of the head rim. The point where this line curves round to the 90° turn is traceable to the body: if you trace the same distance from the divot on the body, you move up along the same angle as the initial three ridges. This small portion is very straight and set against the shadowed neck. Where this very straight section turns just a tad to the left before resuming the same angled line, is the match point to the curve round to 90° on the head. Again, the aggregated distance measurements from this point back to the beginning are identical.
One may object that the straight line on the body doesn’t curve round as much as on the head and is a lot straighter than the head line that’s crinkled. That’s because the straight body line matches the true head rim that runs just ‘below’ the crinkled line on the head when the duck is upright. This head rim is dead straight and deeply recessed by 50-70 metres (directly into the photo frame). It is almost whited out in this photo but is just about visible: a straight line running parallel and to the left of the crinkly line that curves round to the 90° turn.
Moving beyond the 90° turn, the head rim carries on at the usual angle for a distance of about half the length of the crinkly line before turning gently at circa 25°. This small section actually moves inwards slightly, towards the centre of the head. It is mirrored by the corresponding flat section on the body that’s beyond the small step-back. Again, the aggregated measurements are identical.
After that, there are no more matches in this photo because it’s where the head lobe curves round further. Any further matches on the head rim meet the top part of the body that’s out of view here.
Really enjoyable set of images Emily. Thank you to both you and the ever helpful NAVCAM team. They have certainly given us some wonderful, nicely detailed images over the last months and the three close up images here have been nicely processed to highlight 67P’s bizarre terrain.
The third image is excellent, I’ve tried a couple of times to get a good look at this odd feature in other images. This and a number of the long range images are starting to make me think how much the shadows cast by the terrain, the shape and spin of the comet effects on this, and I am thinking a large amount of the layering, or at least apparently layered terraces, is due to the progression of shadows over the surface.
The second close up shows just how scarred and pitted the surface is. The sharpness of the cliff edges against the haze of the coma is a great illustration of how good the lighting is in this image. Great for seeing the topography of the surface too.
The first close up has the best image yet of the “Dunes of Hapi”. I have serious doubts whether they are dunes at all, they appear to be dust covered steps in the terrain just below the dust layer. The layers can be seen in the outcrop at the edge of the dust field. The detail of the Seth region shows this to have a remarkably “volcanic landscape” appearance. Everything has a melted, semi-molten look to it, thermal effects of rapidly heating and cooling the surface material, there is far less dust insulation in this area. This type of topology seems to run around the “tropical zones” of each lobe (if the poles are at the top and neck region of each lobe). These areas would receive the most sunlight throughout the comet year, due to the large shadows cast by each lobe. It is the effect of these shadows that gives such a clear similarity in the profiles of the two lobes, The shapes of the edges of lobes are dictated by the shadows cast by the opposite lobe. See this image to see a perfect illustration of this.
https://www.esa.int/spaceinimages/Images/2015/03/Comet_on_9_March_2015_NavCam
So many interacting processes going on this tiny little world, is it any wonder its shape and surface are so extraordinary?
Great article and pics! 🙂
Hi !
Tell me please,
what is the time difference between the Earth and the satelliteRosetta of the comet 67P ?
Hi Eugene,
The Rosetta-Earth separation is always changing, so the time the radio signals take to travel between the two also varies. Today (30 March) the one way signal travel time is 23 minutes 51 seconds.
I hope that answers your question,
Emily
Thanks for the reply.
What I meant was that there is a statement that on the Earth and the Earth orbit time passes at different rates due to gravitation. This means (in theory) that time on Rosetta will differ from the Earth time, if so, then for how much?
The effects of gravitational time dilation are *minute* on the scale of Earth & lower gravity. You will find a description here:
https://en.wikipedia.org/wiki/Gravitational_time_dilation
You would also have to include velocity time dilation, but again the effects at these velocities are minute.
https://en.wikipedia.org/wiki/Time_dilation#Relative_velocity_time_dilation
At
https://www.esa.int/var/esa/storage/images/esa_multimedia/images/2015/03/comet_on_24_october_2014_navcam/15334092-1-eng-GB/Comet_on_24_October_2014_NavCam.jpg
Those streaks are aligned to the ‘ducting’ of that particular zone. Defending them as projectiles actually ‘departing’ from Coraline.
Maybe hard material, but also brittle. Lots of material is leaving 67P as ‘chunks’.
Hi Emily, H. NAVCAM Team and ESA!
Those swamp looking smooth areas, going from top-left to bottom right of
https://www.esa.int/var/esa/storage/images/esa_multimedia/images/2015/03/comet_on_19_october_2014_navcam/15333881-1-eng-GB/Comet_on_19_October_2014_NavCam.jpg
Could speculatively be muddy deposits, related to the also speculatively cryo-volcanic activity of Seth, at the horizon.
Hi Robin. “…Everything has a melted, semi-molten look to it, thermal effects of rapidly heating and cooling the surface material”.
Layering has a clear inflated ‘eye-form’ shape. Left side relatively unaltered. Right side clearly re-crystallized. It’s not a pre-existent structure. Layering would give ‘clues’ of that.
Hints of a second -more weatherized- similar structure, to the right. Upper structures shows signs suggesting pressure containment, too. Neck’s formerly called ‘singularity’ could be included in this phenomena category.
I swear the neck looks longer in this image than 6 months ago. Does anyone have any accurate before and after measurements?